How to Import and Combine Designs
The importing feature of embroidery software allows you to combine alphabet characters and other designs. It is the utility to use to create names or phrases or to add letters or words to a design. Learn how to use importing and you'll be embroidering personalized custom designs in no time.
In this pictorial we'll show you step by step how easy importing is. The screenshots are from PE-Design 7.x, and though they may not look exactly like your version of PE-Design or your embroidery software, the basic importing process is the same.
- The first thing to do is to determine what hoop size you will be using and then set up your page in Layout & Editing.
Open Layout & Editing and click on Option > Design Page Property… to open the Design Page Property window.
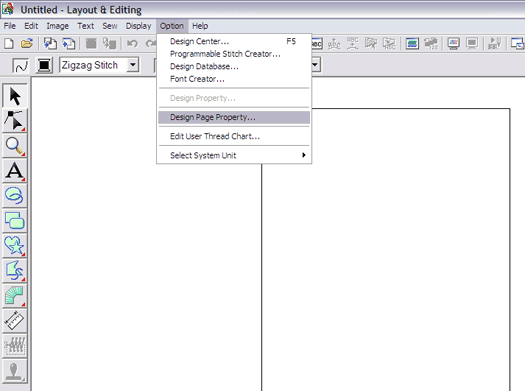
Screenshot 1: Accessing the Design Page Property window
- When the Design Page Property window opens the last hoop used will be in the Hoop Size box. With the Hoop Size radio button active, click the dropdown arrow to select the hoop size you will be using for your design.
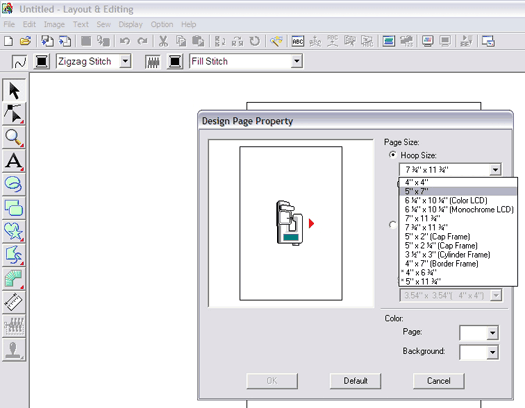
Screenshot 2: Selecting hoop size
- Set the orientation you want. (You can always change these later.) Click OK.
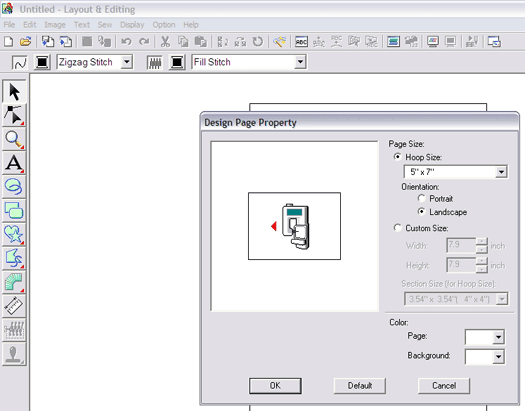
Screenshot 3: Selecting orientation
- Now your page is set up with an outline of the hoop size you selected in the center of the page. Let's make a simple text-only design. Click on File > Import > from File… to access designs saved on your computer.
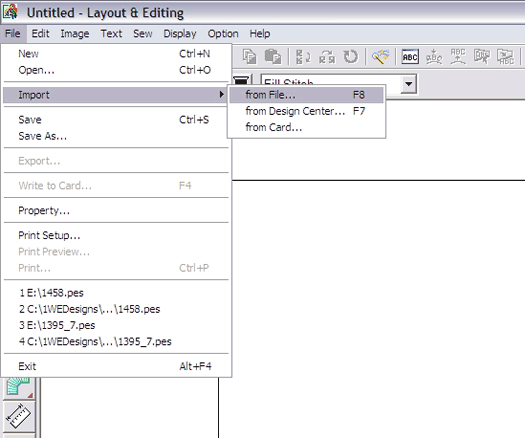
Screenshot 4: Importing from File
- With the Import from File window open you can browse your computer or local network to locate the designs you want.
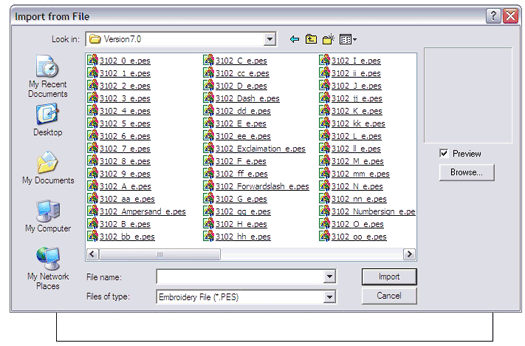
Screenshot 5: Import from File window
- Hover over a design name to highlight it. Check the Preview box to view a thumbnail to make sure you have the right one. Click the Import button.
Note: You can only import one selection at a time.
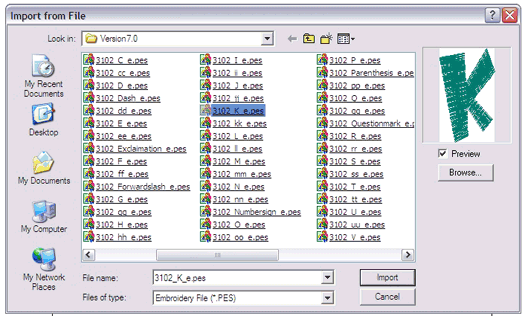
Screenshot 6: Preview box thumbnail
- The design will pop into the center of your hoop.
In the screenshot below the K has handles around it. That's because the selection arrow is active.
Select Display > Grid Setup… to open the Grid Setting window.
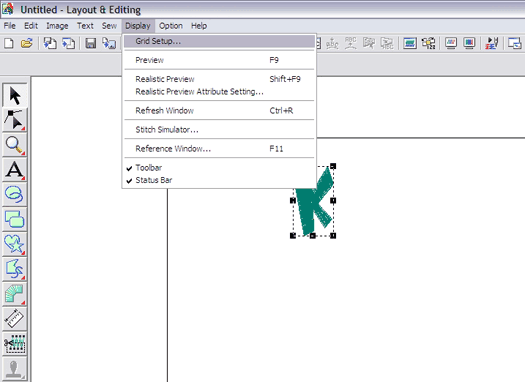
Screenshot 7: Accessing the Grid Setting Window
- If accurate alignment is important, and it almost always is, you'll need to see a grid in order to achieve precise positioning. Take a few minutes to play with the various settings available and get familiar with what they do. When you've made your choices, click OK.
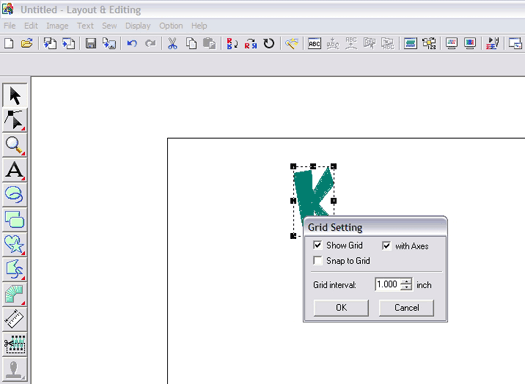
Screenshot 8: Grid Setting Window
- The grid fills your hoop size outline behind the imported design. With the design selected you can move it wherever you want within the hoop outline.
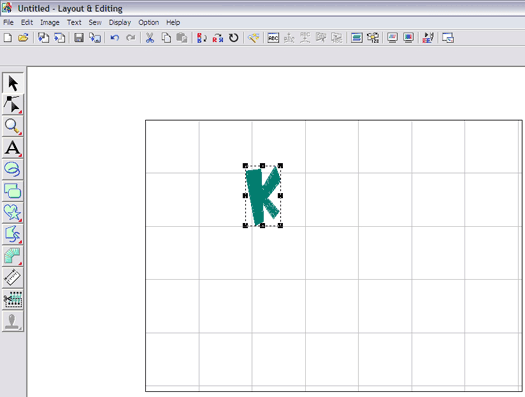
Screenshot 9: Hoop outline with grid
- To add more letters to the design, to "write" a name or phrase for instance, simply repeat the above steps.
When importing multiple designs or alphabet characters each one will be automatically centered in the screen hoop, often over a previously imported and positioned character.
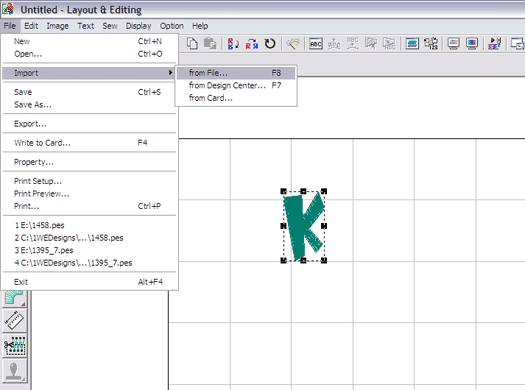
Screenshot 10: Adding letters
- In the screenshot below we are building our design character by character, moving each one where we want within the confines of the hoop.
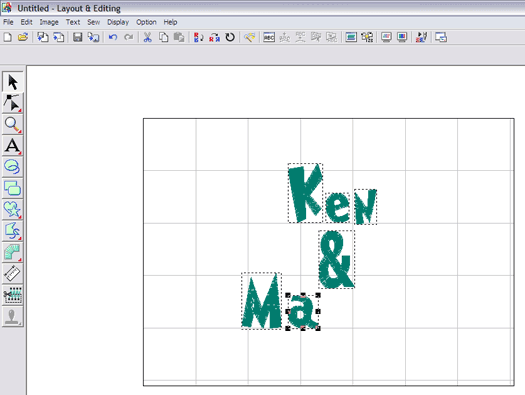
Screenshot 11: Building a text-based design
- Zoom in to make precise adjustments to the spacing.
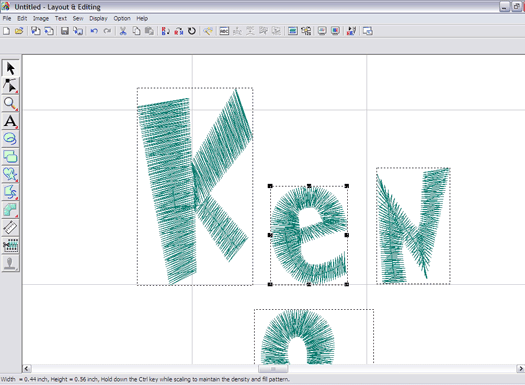
Screenshot 12: Viewing letter spacing up close
- When your design is finished, Save It!
Once you are familiar with the importing process, experiment with the options for modifying the design that are available to you. Depending upon your software you can put the various design elements on a curve or swoosh, rotate them or do other creative things. Play around with the buttons and have fun!
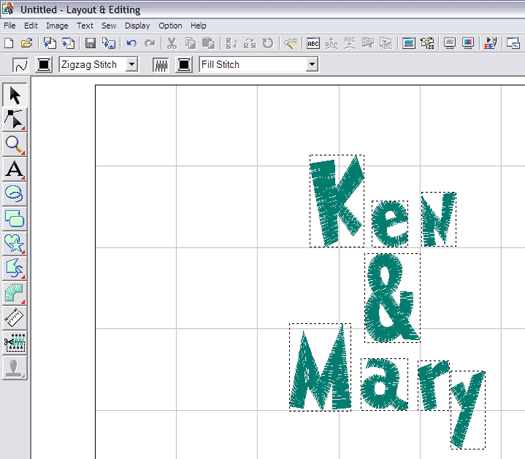
Screenshot 13: Completed design
- Click on Realistic Preview to see how it looks.
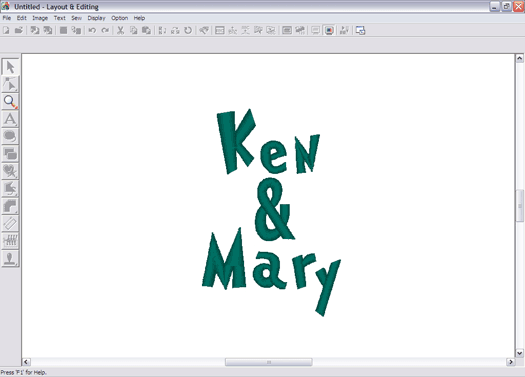
Screenshot 14: Realistic preview
- Before sending your design to your machine, don't forget to SAVE it!


